Meet "J"...he's my oldest Grandson.
J has been asking me for a while when I was going to finish his picture box. So today was the day. I had already completed layouts for his sister and brother. I'll post them at the end so you can see them too.
J loves to ride his dirt bike. So I thought that would be perfect for the layout. I love all the different textures from the embossed Metal foil tape, the die cut elements and the metal Gears. I found the shadow boxes at Ikea but they are readily available. I've even seen frames at Target.
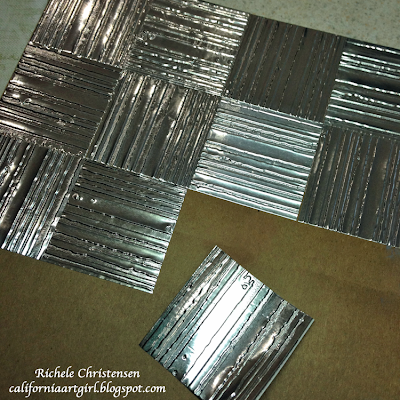
Using the Stripes Texture Fade Embossing folder, emboss Metal Foil tape from Ranger. I like using the Metal Foil Tape, it's so easy to peel and stick. Emboss the metal to cover a piece of chip board to fit your shadow box frame. My pieces were cut to 2" x 2".
With Adirondack paint dabber in Pitch Black paint the entire background.
Before the paint dries wipe off the excess paint. Let dry and buff with a dry towel. The paint will remain in the low areas and create depth.
From Black Kraft'Core die cut gears and filmstrip using the Gadget Gears Bigz die, the Movers and Shapers Mini Gears Set and the Decorative Filmstrip Sizzlit die.
Sand all of your die cut shapes to reveal the core.
Pop Dot all your photos in place first. Then add Sprocket Gears and Mini Gears with long fasteners and mini fasteners from the Idea-ology line. I also added the number 7, the "play" word stick and a word band that says "live in the moment" from Tim Holtz Idea-ology. For the finishing touch I added his name with an Alpha card.
J was so excited to see his layout!
This is Ty and his layout is on the Sizzix blog. You can see the step out instructions here.
You can find Kayla's shadowbox here.
Hope you all had a very Merry Christmas!
Thanks so much for taking the time to stop in.
Richele
If you're looking for all these great product find them at Inspiration Emporium.


