
Hello friends and Happy Valentines Day!
I'm happy to say that I received all my samples back this week that I made for CHA.

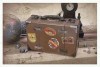
This card features the new ShadowPress Station. What is a ShadowPress Station you ask??? The Station enables you to ink the ShadowPress debossing folders with ink only on the raised area where it will deboss and it keeps the rest of the folder clean. Works like a charm!

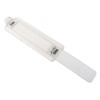
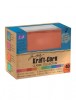
This is the ShadowPress Station! It's basically a template. Some of the features…on the right you will see a little raised tab that's for easy handling, ridges on the underside to lock in your ShadowPress folder, great surface for easy cleaning, works with the existing ShadowPress folders, it's very economical it retails for about $5.00 and will be available in April.

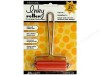
Open the ShadowPress folder and find the raised area of the word. The raised area will be up. Slide the ShadowPress Station over the debossing folder and the little ridges will help hold the folder in place. Hold the folder and Station with one hand and ink the embossing folder by rolling the brayer over the area several times with the other hand. The Ranger brayer works great it is a hard rubber brayer, is small and easy to handle and has feet to sit on so your work surface stays clean. Once you've used the ShadowPress Station it can be cleaned with stamp cleaner.

Insert paper into the folder. Run folder into the Vagabond with the open end of the first.

After you run is through you will have a debased and inked shadow. How cool is that!

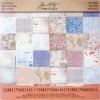
You can use a multitude of surfaces. Like the Textured Surfaces (corrugate, cork, burlap) Deco Sheet (oh so shimmery), cardstock, vellum etc.
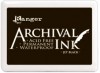
It can be used with all sorts of inks or paints.

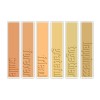
Deboss the ShadowPress words on the paint chip one word at a time. Die cut several hearts from old dictionary print using the Heartfelt Bigz die . This is a great die, it has 11 hearts that are different shapes and sizes and I love that it's a steel rule die so you can cut thick and thin materials.

Add stitching to the background paper and through the hearts. Adhere elements to the base card and you have a card for someone special!
Have a great weekend!
Thanks so much for stopping in!
Richele
 |  |  |  |
 |  |  |  |
 |  |