Hello friends! Today I have more inspiration with the Tim Holtz Distress Crayons! I really love the versatility of the Crayons, how they react when a little water is added, the way they make the surface feel and they come in my favorite Distress colors.

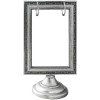
The Flip Frame is a great way to display my mini works of art.
I cut down a piece of Dina Wakley Media Board to fit my Flip Frame (3 1/4" x 5").Dina's new Media Board is coated with Gesso and it's a great surface for the Crayons and I love the added texture.
Draw Distress Crayons directly to the surface. If you are working on a larger area you would want to work in small sections at a time.
Add a little bit of water and blend the Crayons with your fingers.
Add another layer of Distress Crayons to deepen the colors. Add Walnut Stain to the outer edge to create a border and dry with a heat tool.
One of my favorite techniques to do with the Crayons is to lift color back off through a stencil with a damp cloth. The stencil is made with the Mixed Media #3 Thinlits Set. It's always a good thing when you can multi task a product and use them for more them one thing. You could also use a Layering Stencil the new Mini Layering Stencils are the perfect size for small projects and cards.
Use the stencil vertically and horizontally to create interest.
Randomly add Remnant Rubs. Cut out a section of Remnant Rubs, position over the canvas and using the Rub Tool rub the words randomly over the canvas.
Cut Found Relative out and adhere to canvas with Collage Medium. Brush a layer of Collage Medium over the Found Relative and let dry.
Draw around the Found Relative with a dark Distress Crayon and smudge with your finger. This will create a shadow and make the guy stand out. Add a Vial Label with a little Remnant Rub number.
Distress Crayons also work on metal! Draw Crayon directly on to metal pieces and rub off the excess with a dry cloth. The Crayon will stay in the words of the Quote Band and around the raised areas of the Timepiece.
Attach the Timepiece and Mini Gears by poking a hole through the canvas and securing them with Fasteners. I added foam tape behind the Timepiece to raise it up.
Mask off the areas you don't want to splatter with a Post-it Note like his face and the Quote Band at the bottom. The Ranger Distress Splatter brush is a nice size. It's small and I think the splatter stays more contained.
Splatter Black Soot Distress Paint with the Distress Splatter Brush. Apply a few drops of Distress Paint on to your craft Sheet, pick the paint up at the end of the Splatter Brush and splatter on to canvas.
Add Nail Heads to Quote Band with Glossy Accents.
I am really liking the versatility of the Crayons and how you can use them in so many different ways. The possibilities are endless. I can't wait to get some more time to play and experiment.
I hope you will love the Distress Crayons as much as I do.
Thanks for stopping by!
Richele


